In our previous blog “Performance Testing: How? When? Where? | Part 1” we already started answering the perennial questions about testing. There, we reviewed the norm of running tests only in the final stages of a project. That led us to look at its advantages and disadvantages. We then considered whether our features and functionalities need to be ready by the time we test. And we talked about a levels-based approach to performance testing.
So now, let’s see how to integrate the approaches seen in Part 1 with CI/CD frameworks. Then we will also go through our final question: do I need to set up a replica of my production environment?
Working with CI/CD frameworks in performance testing
The benefit of working with CI/CD frameworks with levels-based testing is that you can define one job for each level.
There are several ways to integrate JMeter with Jenkins, but let’s see one that worked best for me.
In your Jenkins you will need to install two plugins:
- Plot: Provides generic plotting (or graphing) capability.
- Performance: Integrates JMeter reports with Jenkins.
Then, if you already have JMeter installed in Jenkins host, you can set Jenkins in order to use it. Just update the JMETER_HOME environment variable (for example, C:\apache-jmeter-5.0\). Otherwise, when you set the test, Performance Plugin will install JMeter the first time you run it.
Once you have everything installed and set, you can create a free-style job and go to the Build option and add a build step: Run Performance Test, as follows:

C:\Users\leticia.almeida\Scripts\script.jmx -o execution.0.concurrency=$CONCURRENCY -o execution.0.iterations=$ITERATIONS -o execution.0.ramp-up=$RAMPUP -report
Where you have:
- C:\Users\leticia.almeida\Scripts\script.jmx: The path where the script is located.
- execution.0.concurrency=$CONCURRENCY: The number of threads or virtual users.
- execution.0.iterations=$ITERATIONS: The number of iterations.
- execution.0.ramp-up=$RAMPUP: The value of the ramp up.
- -report: This tag enables a BlazeMeter external report. Please check:
- https://www.blazemeter.com/blog/load-testing-kpis-part-1-what-are-kpis
- https://www.blazemeter.com/blog/understanding-your-reports-part-2-kpi-correlations
- https://www.blazemeter.com/blog/understanding-your-reports-part-3-key-statistics-performance-testers-need-understand
- https://www.blazemeter.com/blog/understanding-your-reports-part-4-how-read-your-load-testing-reports-blazemeter
If you want to learn more about BlazeMeter, please check BlazeMeter documentation.
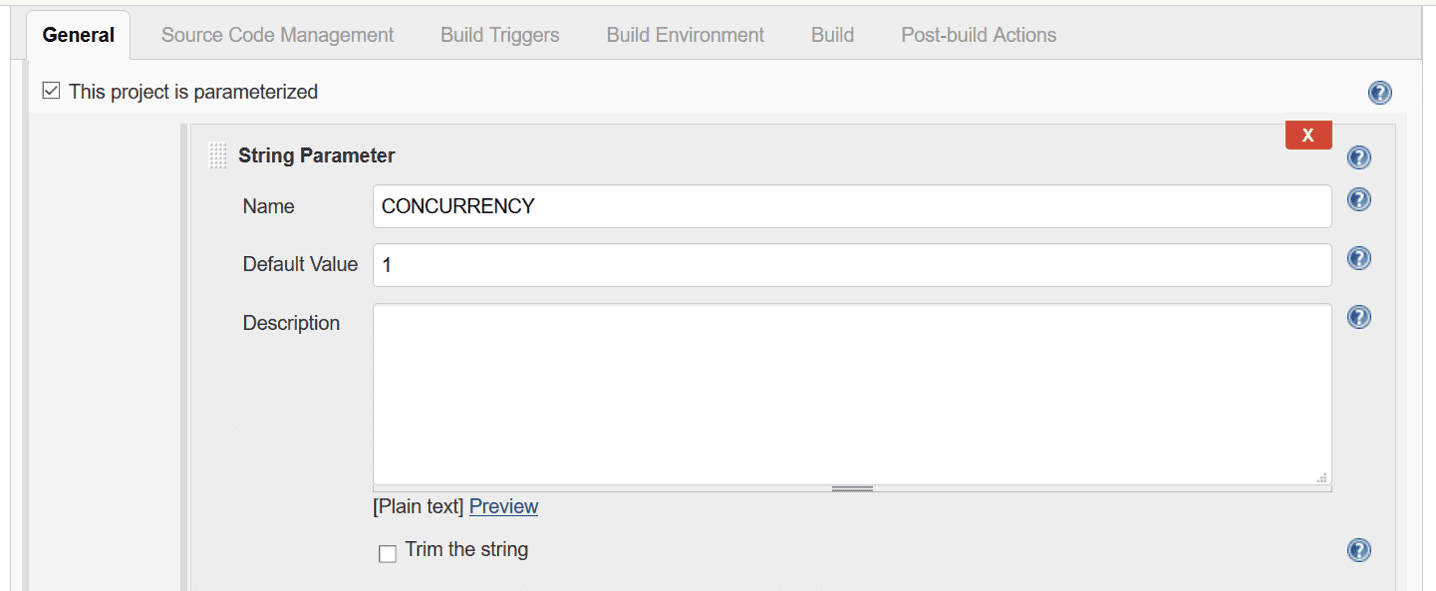
Then, $CONCURRENCY, $ITERATIONS and $RAMPUP are parameters of the building.
You can set this in the General Tab:

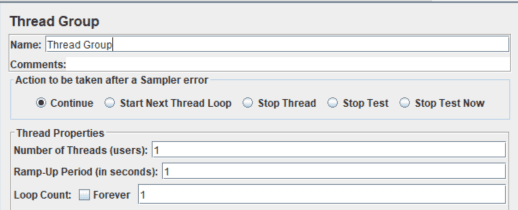
The test will then run with this scenario configuration. This, as you can see, is the same scenario you usually set in JMeter:

Getting to the reports…
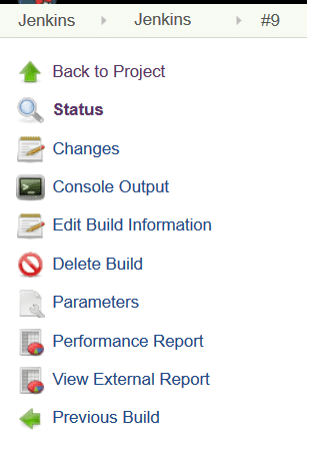
Finally, after the run it, you will see two reports appear in Jenkins:
- Performance Report
- View External Report

These show the results of the test. The first one a comparative report:


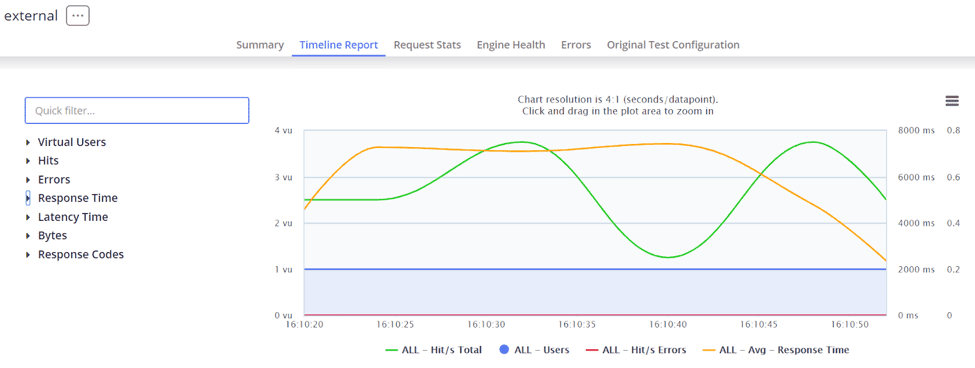
The second one, with the BlazeMeter report link and complete information about the execution (Summary, KPIs, among others):

This way, you can add the testing into your pipeline easily. Also, you can run it after every deploy. As soon as a performance degradation occurs, you will notice and fix it. It’s a great approach.
Working under this approach, keep scripts easy to maintain to avoid false positives.
And now, last, but not least…
Do I need to set up a replica of my production environment?
Well, it depends. Replicas work well in the following situations:
- looking to improve the performance of your environment
- wanting to set the configuration properly
- needing to figure out if your infrastructure can bear the load
- finding possible bottlenecks
In this case, having an production-like environment would be great. Once you have found the optimal configuration, you can replicate the changes into your production environment.
But sometimes you don’t have a replica of your production environment, just a smaller one. In these cases you can run tests for degradation issues in the application itself. The aim is to measure and improve the usage of the resources the application makes. For this, you don’t need a production environment; a test environment is good enough. As before, here we are shifting away from the type of testing you are used to. We are focusing on the application’s performance instead of the whole system. Yes, this is a valid approach, too.
Closing thoughts
So now, taking this into account…which approach that works best for you and why? And in what sort of situations would you prefer performance testing throughout vs. at the end? Share your comments with us!


